
Author name: Tech

Work With Us | Drywall Subcontractors Edmonton
blogs

Winter Drywall Cracks & Nail Pops in Edmonton Homes

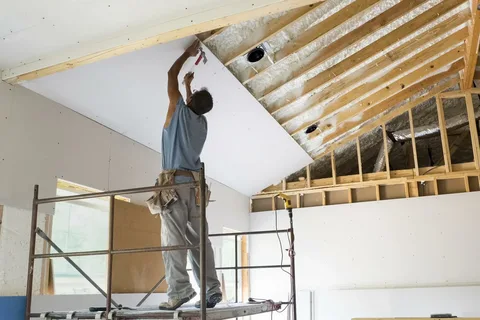
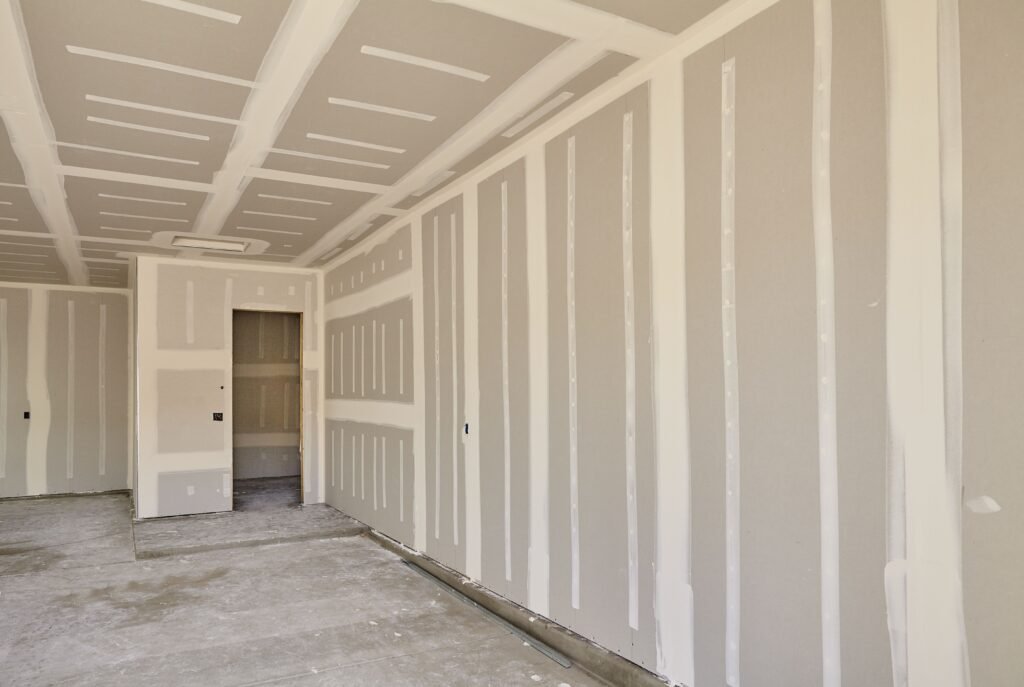
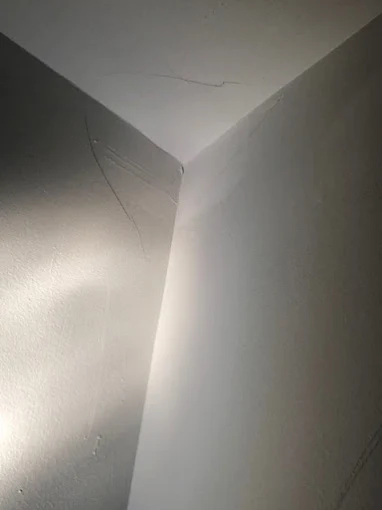
Every November, the same calls start coming in across Edmonton, Sherwood Park, and St. Albert. A homeowner notices a hairline crack running from the corner of a door frame. Small round bumps appear on the ceiling like tiny blisters. A seam between the wall and ceiling opens up in the upstairs hallway. By spring, some of these marks seem to close on their own, only to return the following winter. If this sounds familiar, you are not alone, and your house is probably not falling apart. Winter drywall cracks and nail pops are among the most common interior issues in Edmonton homes. Understanding why they happen is the first step toward fixing them properly instead of patching the same spot every year. In this guide, the team at Executive Drywall explains what causes drywall cracks in Edmonton winters, how to tell cosmetic damage from a warning sign, and what a lasting repair actually involves. Why Edmonton Winters Are So Hard on Drywall Edmonton sees some of the harshest temperature swings of any major Canadian city. Outdoor temperatures can drop below -30°C for days, then climb toward zero during a mild spell. Meanwhile, the inside of your home stays at about 21°C with furnace air that is extremely dry. Drywall itself is fairly stable. The problem is the wood framing behind it. Lumber expands and contracts as its moisture content changes, and Edmonton winters pull moisture out of the air fast. When studs, joists and trusses shrink or shift, the rigid gypsum panels attached to them have nowhere to go. The result is stress that shows up at the weakest points: seams, corners, fasteners and openings. Low indoor humidity Indoor relative humidity in Edmonton homes often falls below 25% in January. Framing lumber dries out and shrinks slightly across its width. That small movement is enough to pull tape away from a joint or push a screw head through the paper face of the board. Truss uplift Truss uplift is one of the most common causes of winter ceiling cracks in newer Edmonton homes. Roof trusses span from one exterior wall to another. In winter, the bottom chord of the truss sits in warm, insulated space while the top chords sit in a cold, often damper attic. The top members absorb moisture and lengthen, which can lift the bottom chord upward by a few millimetres or more. When the truss lifts, it pulls the ceiling drywall up with it. If that drywall is fastened to an interior partition wall, the joint between wall and ceiling cracks open. In spring, the truss settles back down and the crack often closes. This seasonal cycle is a classic sign of truss uplift rather than structural failure. Settling and new-build shrinkage Newer homes in communities like Windermere, The Hamptons or Summerside often show their first cracks during the first two or three winters. Framing lumber continues to dry after construction, and the home settles onto its foundation. Some movement is normal and expected during this period. Foundation and soil movement Edmonton’s clay-heavy soils expand when wet and shrink when dry or frozen. Frost heave and seasonal soil changes can move a foundation slightly, which transfers stress up into the walls. These cracks tend to look different from simple shrinkage cracks, as described below. What Are Nail Pops and Why Do They Appear in Winter? A nail pop is a small round bump or crack on a wall or ceiling where a fastener has pushed outward. In many cases, the fastener has not moved at all. Instead, the wood stud behind it has shrunk, leaving a tiny gap between the drywall and the framing. When someone bumps the wall or the house flexes, the board moves toward the stud and the fastener head breaks through the finish. Nail pops are more common in homes built with nails rather than screws, in ceilings, and in rooms with high temperature swings, such as bonus rooms above garages. They are rarely a structural concern, but simply mudding over them almost guarantees they will return. Common Types of Winter Drywall Cracks Not every crack means the same thing. Here is how to read what you are seeing. Hairline cracks at door and window corners. These run diagonally from the top corners of openings. They usually result from framing shrinkage and normal house movement. Wall-to-ceiling cracks. A straight crack where interior walls meet the ceiling, often opening in winter and closing in summer, points strongly to truss uplift. Tape seam cracks. A long, straight crack along a joint, sometimes with bubbling or peeling tape, often means the joint was under-filled or poorly bedded during installation. Corner bead cracks. Cracks along outside corners usually signal loose or damaged corner bead. Stair-step or wide cracks. Cracks wider than about 3 mm, cracks that keep growing, or cracks paired with sticking doors and sloping floors may indicate foundation movement and should be inspected. When Should You Worry? Most winter drywall cracks in Edmonton homes are cosmetic. However, call a professional for an assessment if you notice any of the following: Cracks wider than a credit card that keep growing month to month Doors or windows that suddenly stick or will not latch Cracks that appear in both drywall and basement concrete in the same area Sagging ceilings or drywall that feels soft or spongy Water stains, bubbling paint or a musty smell near the crack Water stains are especially important. Ice damming on the roof or condensation in the attic can leak into ceilings during winter thaws. In that case, the drywall is a symptom, and the moisture source must be fixed first. Executive Drywall also provides restoration for water-damaged and flooded spaces. How Professionals Repair Winter Cracks and Nail Pops A quick skim coat might hide a crack until the next cold snap. A lasting repair addresses why the crack formed. Repairing nail pops the right way Drive a drywall screw about 40 mm from the popped fastener to pull the board
Fireproof & Waterproof Services Edmonton
blogs

Fireproofing and Waterproofing in Edmonton: What Property Owners Should Know

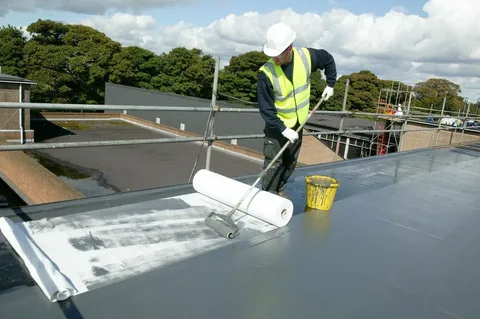
Fire and water do their worst damage inside walls and ceilings, where nobody looks until something has already gone wrong. I think that is why both get treated as afterthoughts. Paint colour gets a week of debate. The board behind the paint gets none. That is backwards. The choice of board, sealant and membrane decides how long a fire stays in one room and whether a slow leak becomes a mould problem. Both are engineered systems, and both fail at their weakest detail. I wrote this guide for Edmonton homeowners and small commercial owners planning a basement, bathroom, suite or tenant fit-out. It explains how each kind of protection works, which materials do what, what the code asks for, and how to judge a contractor.  How Fire Protection Works Inside a Wall Fireproofing a building does not make it unable to burn. It buys time by keeping fire and smoke in the room where they started, so people can get out and firefighters can get in. Builders call this passive fire protection, and it has three working parts. Gypsum board Gypsum holds water bound in its crystals. In a fire that water is driven off as steam, which keeps the far side of the board cool until the core is spent. Type X board adds glass fibres so the core holds together longer. Rated assemblies A fire rating belongs to a whole tested assembly: studs, board, fasteners, spacing and joints together. Swap one part and the rating no longer applies. Firestopping Every pipe, cable and duct that passes through a rated wall leaves a hole. Firestop sealants and collars close those holes, and many of them swell when heated. Structural steel is a separate case. Steel loses strength quickly as it heats, so exposed members are protected with sprayed coatings or intumescent paint. Executive Drywall describes its own fireproofing as applying specialized materials and coatings to prevent fire spread. How Waterproofing Works Waterproofing is a continuous barrier, and it only works if it has no gaps. Water arrives three ways, and each one needs a different answer. Liquid water  Showers, tub surrounds and floors around drains get wet directly. They need a membrane, either a sheet or a liquid that cures into a film, lapped at every seam and sealed at every corner and fixture. Vapour Warm indoor air carries moisture into cold wall cavities, where it condenses. A vapour barrier on the warm side and proper ventilation deal with this. Ground moisture Concrete basement walls and slabs pass moisture from the soil. Finished walls need a gap or an insulation layer that tolerates damp, so the framing and board never sit wet. The most common mistake I see described is treating moisture-resistant board as waterproof. It is not. Green board slows absorption. Cement board survives being wet but lets water through. In a sher, the membrane does the waterproofing and the board only supports it. Executive Drywall lists waterproofing for bathrooms, basements and other moisture-prone areas, which are the three places where this distinction matters most. Why Edmonton Raises the Stakes Edmonton’s climate and housing stock push both risks higher than a generic guide assumes. Long, cold winters create a large temperature gap between indoor air and exterior walls, which drives condensation inside poorly sealed cavities. Spring snowmelt then loads the soil around foundations with water just as the ground thaws. Basements take the brunt of both. The city also has a large and growing number of basement suites. A suite puts a second household, a second kitchen and often a shared furnace room under one roof. That is the situation fire separation exists for. Materials Compared Each board and membrane does one job well, and most failures come from asking a product to do a job it was not made for. Material What it does Where it belongs What it does not do Standard gypsum board Basic fire resistance; smooth finish Dry rooms; smoke-tight barriers where code allows Tolerate repeated wetting Type X gypsum board Longer fire endurance in rated assemblies Suite separations, furnace rooms, garages, corridors Earn a rating on its own, outside a tested assembly Moisture-resistant board Slows moisture absorption Bathroom walls outside the shower, laundry rooms Waterproof a shower Cement board Stays stable when wet Tile backer in showers and tub surrounds Stop water without a membrane Sheet or liquid membrane Blocks liquid water Showers, wet floors, around drains Work if seams and corners are skipped Firestop sealant Seals penetrations; many types swell in heat Any pipe, cable or duct through a rated wall Replace missing board Steel studs deserve a mention too. They do not burn or rot, which is why Executive Drywall cites steel framing’s resistance to fire and pests. What the Code Requires in Edmonton A secondary suite in Edmonton needs a building permit, and the fire separation rules are specific. The City’s Secondary Suite Design Guide, dated January 31, 2025 and based on the National Building Code 2023 Alberta Edition, sets out the following. Barrier A continuous smoke-tight barrier of at least 12.7 mm (½ in) gypsum board must separate the suite from the main dwelling. Where it goes On the underside of the floor above, on both sides of shared walls, around shared exits, around storage and laundry rooms, and around any room with a fuel-fired appliance. Doors Doors in the barrier must be solid-core wood at least 45 mm thick, with a self-closer. Smoke alarms Hardwired and interconnected through the whole house, in every bedroom, hallway and common or service room. The word that matters is continuous. One unsealed duct chase defeats the barrier. Commercial spaces follow different, stricter rules, so confirm requirements with the City before work starts. How to Choose a Contractor Both kinds of work get covered up, so the questions you ask before the job matter more than the look of the finished wall. Which tested assembly are you building, and can I see the listing? Who firestops the plumbing and electrical penetrations, and

Paint and Texture in Edmonton
blogs

Paint and Texture in Edmonton: What Makes a Wall Finish Actually Last

Paint is the thinnest layer in a building. A dried coat is thinner than a sheet of paper, and it follows whatever is underneath it exactly. I think that single fact explains most disappointing paint jobs. People choose the colour carefully and assume the paint will hide the wall. It does the opposite. It shows the wall. Texture works the other way. It adds depth, breaks up light and forgives a surface that is less than perfect. Used well, the two together decide how a room looks at noon, how it looks under a lamp, and how it looks in ten years. I wrote this guide for Edmonton homeowners and small commercial owners planning new walls, a repaint or a ceiling update. It covers preparation, texture types, paint choices, what the local climate does to finishes, how a professional job runs, and how to judge a contractor. Preparation Is Most of the Job The quality of a painted wall is set by the drywall finishing underneath it. The trade grades that finishing in levels from 0 to 5, and the level you pay for should match the paint and lighting you plan to use. Level 3: Tape plus two coats of compound. Suitable under a heavy texture, which hides the rest. Level 4: Tape plus three coats, sanded smooth. The standard for flat paint and light textures in most rooms. Level 5: Level 4 plus a thin skim coat over the entire surface. Needed for glossy paint or walls washed by low-angle light from large windows. Three other steps matter as much as the level. Repairs: Dents, nail pops, cracks and old patches must be filled, sanded flush and spot-primed. Anything left will show through two coats. Dust: Sanding dust left on the wall stops paint bonding. Walls should be wiped or vacuumed before primer. Primer:  New drywall has two surfaces, paper and compound, that absorb paint differently. A drywall primer evens them out. Skip it and the joints show as dull bands, an effect painters call flashing. Choosing a Texture Texture is a design choice with practical consequences. Each type hides flaws, reflects light and repairs differently. Texture How it looks Best use Trade-off Smooth Flat, modern, clean Feature walls, contemporary homes, bright rooms Shows every flaw; needs Level 4 or 5 finishing Orange peel Fine, even dimpling Walls in busy rooms and rentals Mild look; easy to patch Knockdown Flattened, mottled pattern Ceilings and walls where some character is wanted Harder to match when repaired Popcorn Heavy, bumpy spray Older ceilings; some sound dampening Dated, collects dust, hard to clean or paint Hand-trowelled Custom, plaster-like patterns Feature areas and decorative work Depends heavily on the installer’s skill Executive Drywall describes its own texture coatings as ranging from smooth finishes to custom decorative patterns. My rule of thumb is to match texture to light. Rooms with large windows or long hallways lit from one end punish a poor smooth finish. A light texture in those spaces often looks better and costs less than chasing perfection. Choosing a Paint Sheen matters more than brand, because sheen decides both how washable a wall is and how much of the surface it reveals. The two pull in opposite directions. Flat or matte: Hides flaws best and touches up invisibly. Marks easily. Good for ceilings and low-traffic rooms. Eggshell: A slight glow and reasonable washability. The usual choice for living rooms and bedrooms. Satin: Wipes clean well. Suited to hallways, kitchens and children’s rooms. Semi-gloss: Tough and moisture tolerant. Used on trim, doors and bathrooms. Shows every dent. Two more points are worth knowing. Better paint contains more solids, so it covers in fewer coats and lasts longer between repaints. And low-VOC products matter in a climate where windows stay shut for months, because the smell and emissions have nowhere to go. Two finish coats over primer is the normal standard. A quote built on one coat is not comparable with a quote built on two. What Edmonton Does to a Finish Edmonton’s long heating season dries indoor air, and dry air moves buildings. Wood framing shrinks through the winter and swells again in summer. That movement shows up as hairline cracks at ceiling corners, screw pops and gaps where trim meets wall. It is normal, and flexible caulk at joints plus a spring touch-up deals with most of it. New basements have the opposite issue. Fresh concrete and compound hold moisture, so paint applied before the space has dried out can blister or peel. Older homes carry one risk that deserves real caution. Health Canada says asbestos was widely used in building materials before 1990, including ceiling tiles, plaster, drywall and surface treatments such as paint and spackling. It poses no significant risk if left undisturbed, but sanding or scraping can release fibres. The agency’s advice is to hire a professional to test before renovating and a qualified specialist to remove anything found. So before scraping a popcorn ceiling in a pre-1990 house, test it. How a Professional Job Runs A paint and texture job follows a fixed order, and most of it happens before any colour goes on. Assessment and quote: The contractor checks the surfaces, the lighting and any repairs, then prices the scope in writing. Protection: Floors, furniture, fixtures and windows are covered and masked. Repairs and finishing: Cracks, holes and joints are filled, sanded and brought to the agreed level. Primer: New and repaired areas are sealed. Texture: Texture is sprayed or trowelled, then left to dry fully. Paint: Ceilings first, then walls, then trim, in two finish coats. Cleanup and walkthrough: Masking comes off, and you check the work together in daylight. I would do the walkthrough with a bright light held close to the wall. It shows ridges and missed spots that overhead lighting hides. How to Choose a Contractor Two quotes for the same room can differ widely because they describe different amounts of preparation. Ask questions that make the scope visible. Which drywall

How to Find Trusted Drywall Contractors in Edmonton
blogs

How to Find Trusted Drywall Contractors in Edmonton

Drywall work can make or break the look of your home. A smooth, well-finished wall makes a room feel clean and put together. A poor job leaves bumps, cracks, and uneven paint that you notice every day. That’s why picking the right drywall contractor matters so much. This guide will help you find a trusted drywall contractor in Edmonton. You will learn what to look for, what questions to ask, and what red flags to avoid. Why Hiring the Right Contractor Matters Drywall might look simple, but it takes real skill to get right. A good contractor knows how to measure, cut, hang, tape, and sand so the wall looks flawless once it’s painted. What Can Go Wrong With a Bad Job Visible seams and bumps in the wall Cracks that appear a few months later Uneven texture that shows under lighting Nail pops sticking out of the surface Poor soundproofing between rooms What a Good Contractor Delivers Smooth, even walls with no visible seams Proper support so cracks don’t form later Clean job sites with little mess left behind Work finished on time and on budget Step 1: Know What Kind of Job You Need Before you start searching, figure out what type of drywall work your project needs. This helps you ask the right questions later. Common Types of Drywall Work New installation – hanging drywall in a new build or addition Repair work – fixing holes, cracks, or water damage Basement finishing – turning a bare basement into a livable space Renovations – updating walls during a kitchen or bathroom remodel Texture and paint – adding texture or a finished paint coat Soundproofing – adding extra material to reduce noise between rooms Knowing your project type helps you find a contractor who specializes in that kind of work. Step 2: Search for Local Contractors Start by building a list of drywall contractors who work in the Edmonton area. Where to Look Search online for “drywall contractors Edmonton” Check local business directories Ask neighbors, friends, or coworkers for names Look at posts in local Edmonton community groups online Check with hardware stores, since they often know local trades Narrow Down Your List Try to end up with three to five contractors to compare. This gives you enough choice without feeling overwhelmed. Step 3: Check Reviews and Reputation Once you have a list, dig into what other customers say about each contractor. Where to Find Reviews Google reviews Facebook business pages The Better Business Bureau (BBB) Local Edmonton Facebook groups What to Look For in Reviews Comments about the quality of the finished walls Notes about whether the crew was clean and tidy Mentions of showing up on time How the company handled any problems or complaints A few negative reviews are normal. Pay attention to how the company responded to them. A professional reply shows they care about fixing issues. Step 4: Confirm Licensing and Insurance This step protects you if something goes wrong during the project. Ask About Insurance A trusted contractor should carry liability insurance. This covers damage to your home during the work. Ask About WCB Coverage In Alberta, contractors should have Workers’ Compensation Board (WCB) coverage for their crew. This protects you if a worker gets hurt on your property. Ask for Proof Don’t just take their word for it. Ask them to send you a copy of their insurance certificate before work begins. Step 5: Get Multiple Quotes Never hire the first contractor you talk to. Getting a few quotes helps you understand fair pricing and spot red flags. What a Good Quote Includes Cost of materials Labor charges Estimated timeline What’s included and what’s not Watch Out for These Red Flags A quote that is much lower than the others Vague pricing with no written breakdown Pressure to pay the full amount upfront Reluctance to put anything in writing Compare Apples to Apples Make sure each quote covers the same scope of work. A cheap quote might be missing steps like sanding or priming. Step 6: Ask the Right Questions A short conversation can tell you a lot about a contractor’s experience and communication style. Questions About Experience How many years have you worked in drywall? Have you done projects like mine before? Can you show photos of past work? Questions About the Process How long will the project take? Will the same crew be on site every day? How do you handle dust and cleanup? Questions About Guarantees Do you offer a warranty on your work? What happens if cracks appear after the job is done? A trusted contractor will answer clearly and won’t seem rushed or annoyed by your questions Step 7: Review the Contract Carefully Once you pick a contractor, make sure everything is in writing before work starts. What Your Contract Should Include Full project description Total cost and payment schedule Start date and expected finish date Details about materials being used Warranty information Don’t Skip This Step A verbal agreement is not enough. A written contract protects both you and the contractor if there’s ever a disagreement. Step 8: Watch the Work in Progress Once the project starts, stay involved without micromanaging. Things to Check During the Job Are the seams being taped and sanded smoothly? Is the crew keeping the space reasonably clean? Are they sticking to the agreed timeline? Communicate Early If something looks off, mention it right away. It’s much easier to fix a problem during the job than after the walls are painted. Signs You’ve Found a Trustworthy Contractor They give you a clear, detailed, written quote They have strong reviews and can show past work They carry proper insurance and WCB coverage They communicate clearly and answer questions patiently They offer a warranty on their finished work Final Thoughts Finding a rtusted professional drywall contractor in Edmonton takes a little time, but it’s worth the effort. Check reviews, confirm insurance, compare quotes, and ask clear questions before you sign anything. A

Commercial Drywall Contractors Edmonton
blogs

Behind Every Solid Office Build: What Commercial Drywall Contractors in Edmonton

Walk into any finished office, retail store, or warehouse and you probably don’t think twice about the walls. That’s kind of the point. Good drywall work is supposed to disappear into the background, smooth, straight, and quiet. But get it wrong, and suddenly every visible seam, uneven corner, or crack after six months becomes something everyone notices. That gap between a decent job and a great one is usually why business owners start looking for commercial drywall contractors edmonton businesses can actually count on. This isn’t just about slapping up boards and calling it a day. Commercial drywall work comes with its own set of headaches that residential jobs just don’t have, and knowing what separates a solid contractor from a shaky one can save a project from turning into a mess. Why Commercial Drywall Isn’t the Same as a Home Reno A lot of people assume drywall is drywall, whether it’s going into a bedroom or a bank lobby. That’s not really true. Commercial spaces come with their own rules, and a contractor who’s only done residential work can get caught off guard fast. A few things that make commercial jobs different: Bigger square footage, which means tighter timelines matter a lot more Fire ratings and sound codes that residential walls usually don’t need to meet Work sometimes happening around an active business, not an empty house Coordination with electricians, HVAC crews, and other trades on site at the same time Stricter building code inspections before a space can open None of this is impossible to manage. It just takes a contractor who’s actually done it before, not someone learning the commercial side on your dime. What the Work Actually Looks Like Framing First Before any board goes up, there’s steel stud framing to deal with in most commercial builds. Steel holds up better than wood in a lot of commercial applications, and it needs to be set precisely so everything that comes after, the drywall, the electrical runs, the insulation, actually fits the way it should. Hanging and Taping Getting the boards up sounds simple, but the real skill shows in the taping and mudding after. This is where seams either disappear completely or become an eyesore under the wrong lighting. A rushed taping job might look fine right after install and then show every joint a few months later once the building settles. Fire and Sound Requirements Commercial buildings often need fire-rated drywall in specific areas, stairwells, mechanical rooms, shared walls between tenants. Getting this wrong isn’t just a cosmetic issue. It can fail inspection and delay opening a space entirely. Soundproofing matters too, especially for offices, medical spaces, or anywhere privacy actually matters. Finishing Touches Texture, paint prep, and final smoothing round out the job. This is the part clients actually see and judge the whole project by, even though it’s really the last five percent of the total work. What to Look for Before You Hire Not every drywall company handles commercial scope the same way, and the difference shows up fast once the project’s underway. Before signing anything, it’s worth asking a few direct questions. Has the company actually completed commercial projects before, not just larger residential jobs? Do they understand local building codes and fire rating requirements without needing it explained to them? Can they realistically hit a timeline that works around your business hours or opening date? And do they carry proper insurance and licensing for commercial-scale work, not just a general contractor’s license? Finding commercial drywall contractors edmonton business owners have actually worked with before, not just a name from a quick search, tends to save a lot of stress. A contractor who’s done commercial buildouts knows how to work alongside other trades without the whole schedule falling apart. Timelines: What’s Realistic Commercial drywall timelines depend heavily on square footage and how much coordination is needed with other trades. A small retail buildout might wrap up in a couple of weeks. A larger office space or multi-unit commercial building can take significantly longer, especially once framing, insulation, taping, and finishing all get factored in. The honest answer is that anyone promising an unrealistically fast timeline on a large commercial job is either cutting corners or setting expectations they can’t actually meet. A contractor who gives a realistic timeline upfront, even if it’s longer than you hoped, is usually the one who follows through. Common Problems That Show Up Later A lot of commercial drywall issues don’t show up on day one. They show up months later, and by then they’re a lot more expensive to fix. Visible seams or bubbling tape from rushed mudding Cracks near corners where framing wasn’t properly secured Sound bleeding through walls that were supposed to be soundproofed Failed fire inspections because the wrong board type went up in the wrong spot Uneven texture that only becomes obvious under certain lighting Most of these trace back to one thing: rushing the job to hit a deadline instead of doing it right the first time. Getting It Done Right the First Time Commercial drywall isn’t the kind of thing where cutting corners saves money in the long run. A patched-together job might pass on opening day and then cause real headaches, and real costs, a year down the line. If you’re planning a commercial buildout or renovation in Edmonton, it’s worth taking the time to find commercial drywall contractors edmonton businesses have genuinely had good experiences with, rather than whoever’s available fastest. Ask about their commercial project history, their understanding of code requirements, and how they plan to work around your business without derailing your timeline. At the end of the day, the walls people never think about are usually the ones that were built by someone who actually knew what they were doing.

Commercial & Home Drywall Services Edmonton
blogs

Trusted & Professional Drywall Contractor Services Edmonton

All Your Drywall Building Needs Under One Roof When you’re planning a renovation, a new build, or a commercial fit-out, drywall is the foundation that everything else depends on. Uneven walls, poor taping, or the wrong insulation choice can throw off a whole project — and cost you time and money down the line. Executive Drywall exists to make sure that never happens. We’re a full-service drywall contractor serving Edmonton, Sherwood Park, and St. Albert, offering everything from installation and framing to texture, painting, insulation, and repair. With 20+ years of industry experience, our team has worked on homes, offices, retail spaces, and everything in between — which means whatever your project looks like, we’ve likely already tackled something similar. Below, you’ll find a breakdown of everything we offer, how our process works, and answers to the questions we hear most from Edmonton homeowners and business owners. Why Homeowners and Businesses Choose Executive Drywall Free, No-Obligation Estimates Every project starts with a conversation, not a contract. Call us or fill out our contact form, and we’ll set up a time to discuss your space, your goals, and your budget — then follow up with a transparent, accurate quote. No pressure, no hidden fees. Project Management From Start to Finish Drywall work involves a lot of moving parts: framing, hanging, taping, texture, and finishing all have to happen in the right order and on the right timeline. We manage the entire process ourselves, so you’re not stuck coordinating between multiple trades or chasing down status updates. One point of contact, one team, one schedule. Highly Trained, Professional Staff Our crews aren’t subcontracted out to whoever’s available that week. We invest in ongoing training so our installers, tapers, and finishers are working to the same standard on every job, whether it’s a single bedroom or a multi-unit commercial build. High-Quality Materials We use industry-leading drywall board, joint compound, and finishing products rated for the specific application — moisture-resistant board in bathrooms, fire-rated board where code requires it, soundproofing assemblies where privacy matters. The right material for the right wall. Pro Equipment & Innovations From automatic taping tools to texture sprayers, we invest in equipment that speeds up the job without sacrificing the finish quality. That means less dust, less mess, and a faster turnaround for you. Our Services Steel Stud Framing Before any drywall goes up, the frame has to be right. We install steel stud framing for both residential and commercial projects — straight, level, and built to code, whether you’re adding a wall, finishing a basement, or framing out an entire commercial interior. Steel stud framing is especially common in commercial builds because of its fire resistance and long-term durability compared to wood. Hanging & Taping This is the stage that determines how your finished walls will actually look. We hang drywall sheets with precise measurements to minimize seams and waste, then tape and mud every joint in multiple coats, sanding between each one, so the wall is smooth and ready for texture or paint. Poor taping is one of the most common causes of visible seams and cracking later on — it’s not a step we rush. Texture Coatings & Painting Once the walls are taped and sanded, we apply the texture finish of your choice — smooth, orange peel, knockdown, or a custom match to your existing walls — followed by professional-grade paint application. If you’re doing a repair or addition to an existing space, we can match the current texture so the new section blends in seamlessly rather than standing out. Insulation & Soundproofing Whether you’re insulating a new build for energy efficiency or soundproofing a home office, media room, or shared commercial wall, we install the right insulation and acoustic assemblies for the job. This includes batt insulation, spray foam options, and resilient channel or double-stud soundproofing systems for spaces where noise control matters most. If you’re planning a basement renovation, our basement drywall installation guide walks through how insulation and soundproofing typically factor into that kind of project. Renovations & Repairs Not every job is a full build-out. We handle drywall repairs of all sizes — patching holes, fixing water damage, repairing cracked seams — as well as larger renovation projects that involve removing and reframing walls, updating layouts, or bringing older commercial spaces up to current standards. If you’re a business owner weighing a renovation, our post on commercial drywall renovation projects covers what to expect in terms of timeline, cost factors, and minimizing disruption to daily operations. Fireproofing & Waterproofing Certain spaces — mechanical rooms, shared walls between units, kitchens, bathrooms — require fire-rated or moisture-resistant drywall systems to meet code and protect the building long-term. We install fire-rated assemblies and waterproof board where it’s needed, so your project passes inspection and holds up over time. Warranties We stand behind our work. All installation and finishing work is backed by a workmanship warranty, so if something isn’t right, we’ll make it right. Ask your estimator for the specific warranty terms tied to your project scope. Our Process 1. Estimate We start with a call to understand your project, followed by an on-site visit to assess the space. From there, you’ll receive a clear, itemized quote that reflects your budget and expectations — no surprises later. 2. Plan & Design Once you’re ready to move forward, our team works with you to finalize the details: materials, finish type, timeline, and any special requirements like soundproofing or fire ratings. 3. Build Our crews execute the work using quality materials and professional equipment, keeping you updated as the project progresses so you always know where things stand. Ready to get started? Contact our team to book your free estimate — most residential estimates can be scheduled within a few days. Frequently Asked Questions How much does drywall installation cost in Edmonton? Cost depends on room size, ceiling height, and the finish level you’re after — smooth, textured, or paint-ready. We provide a free, no-obligation estimate

Basement Drywall Edmonton
blogs

Basement Drywall Edmonton: The Complete Guide to Finishing Your Basement Right

A basement is often the most underused space in an Edmonton home — until it’s finished properly. The single factor that determines whether a finished basement lasts twenty years or turns into a mold problem within five is the drywall system behind the paint: the board type, the framing, the vapor barrier, and the installation method. This guide covers everything a homeowner needs to understand about basement drywall in Edmonton, from material selection to code requirements to what separates a professional installation from a rushed one. What Basement Drywall Actually Means Drywall (also called gypsum board or sheetrock) is a panel made of gypsum plaster pressed between two sheets of thick paper. It’s the standard interior wall and ceiling material across North America because it’s affordable, fast to install, and easy to finish smooth or textured. Basement drywall refers to drywall systems designed — or adapted — for below-grade spaces, where conditions differ significantly from those in the rest of the house. Basements sit partially or fully underground, which means they’re exposed to soil moisture, groundwater pressure, and temperature swings that upper floors never experience. Standard drywall, framing, and insulation choices that work fine in a living room can fail in a basement if they’re not selected and installed with that environment in mind. Why Edmonton’s Climate Changes the Equation Edmonton’s climate is a major variable in basement construction, and it’s one local homeowners can’t ignore. The city experiences: Deep frost penetration — Edmonton’s frost line can reach 1.8 to 2.4 metres, meaning foundations and basement walls are in contact with ground that freezes and thaws seasonally, creating hydrostatic pressure and occasional moisture intrusion through foundation walls. Wide humidity swings — dry winters followed by humid summer months mean basement walls experience condensation risk twice a year, particularly where warm indoor air meets a cool concrete surface. Older housing stock — many Edmonton neighborhoods have homes built in the 1960s–1990s with basements that were never designed for finished living space, meaning insulation, vapor barriers, and drainage may need upgrading before drywall goes up. This is why generic drywall advice found online often doesn’t translate directly to an Edmonton basement. The materials and assembly need to account for local ground conditions and the Alberta Building Code, not just national drywall standards. Types of Drywall Used in Basements Not all drywall is interchangeable, and choosing the wrong type is one of the most common — and costly — mistakes homeowners make. Moisture-Resistant Drywall  Green board has a water-resistant paper facing and is commonly used in basements near mechanical rooms, bathrooms, or areas with higher ambient humidity. It resists moisture absorption better than standard board but is not waterproof. Mold- and Mildew-Resistant Drywall  This type uses a fiberglass-reinforced core and a specialized paper coating designed to resist mold growth, making it a strong choice for basements with a history of dampness or for homes near the river valley, where soil moisture tends to be higher. Standard Drywall In fully dry, well-insulated basements with a properly installed vapor barrier and no history of water issues, standard 1/2-inch drywall is often sufficient and more cost-effective. Soundproof and Fire-Rated Drywall For basements used as home theatres, rental suites, or secondary living spaces, thicker or laminated drywall products reduce sound transfer between floors and can meet fire-separation requirements when a basement includes a legal secondary suite. The right choice depends on the specific basement — its moisture history, intended use, and proximity to plumbing or grade-level walls. A qualified contractor typically won’t use one blanket product throughout; different rooms and wall sections may call for different boards. The Basement Drywall Installation Process A properly finished basement follows a sequence, and skipping steps is where most failures originate. Moisture assessment. Before any framing begins, the foundation walls are checked for existing dampness, efflorescence (the white mineral deposits left by water evaporation), or cracks that need sealing. Framing. Wood or metal studs are built out from the foundation wall, leaving an air gap that allows any incidental moisture to drain rather than sit against organic material. Insulation and vapor barrier. Rigid foam or batt insulation is installed according to the Alberta Building Code minimum R-values for below-grade walls, followed by a properly placed and sealed poly vapor barrier — a step where placement and seaming matter as much as the material itself. Electrical and mechanical rough-in. Wiring, plumbing, and any HVAC modifications happen before boarding, since drywall installation is far more difficult and costly to redo afterward. Hanging the drywall. Sheets are measured, cut, and screwed to the studs with proper spacing, staggered seams, and attention around outlets, windows, and mechanical penetrations. Taping, mudding, and sanding. Joints are taped and covered in several coats of joint compound, sanded smooth between coats to create a seamless wall surface ready for primer and paint. Finishing. Corner beads, texture (if desired), primer, and paint complete the wall system. Each stage depends on the one before it. Framing done without addressing moisture, or drywall hung before proper vapor barrier sealing, tends to surface as problems — cracking, staining, or musty odors — months or years later rather than immediately, which is why cutting corners is so tempting and so risky. Cost Factors for Basement Drywall in Edmonton Pricing for basement drywall work in Edmonton varies based on several factors rather than a flat per-square-foot number: Basement condition — a bare, unfinished basement with exposed studs costs less to drywall than one requiring moisture remediation, re-framing, or insulation upgrades first. Ceiling height and layout complexity — basements with low headroom, bulkheads around ductwork, or irregular layouts around support posts and mechanical rooms require more cuts and labor. Drywall type — moisture- and mold-resistant boards cost more per sheet than standard drywall. Finish level — a smooth, paint-ready finish requires more coats and sanding time than a basic-level finish, and textured ceilings or walls add labor. Permits and inspections — if the work includes a secondary suite or structural changes, permit fees and required

Professional Drywall Installation Sherwood Park
blogs

Professional Drywall Installation Sherwood Park | Expert Team

Finding reliable Professional Drywall Installation Sherwood Park services can be tricky. Quality work matters for both homes and businesses across the region. Why Drywall Installation Matters Drywall forms the backbone of every finished interior space. Poor installation leads to cracks, uneven walls, and costly repairs later.A smooth, level wall improves your home’s overall look. It also affects insulation, soundproofing, and fire resistance throughout the building.Skipping professional help often costs more in the long run. DIY mistakes lead to sagging seams and visible joint lines.Poorly finished walls also lower a property’s resale value. Buyers notice uneven surfaces and rough texture immediately during viewings. Finding Trusted Drywall Companies Sherwood Park Not all contractors deliver the same quality. Choosing skilled Drywall companies Sherwood park homeowners trust makes a real difference.Look for contractors with proven experience and local knowledge. They understand regional building codes and common construction challenges here. At executivedrywall, our team has years of hands-on experience. We handle everything from small patch jobs to full-scale installations.Ask potential contractors about their process and timeline. A clear plan prevents delays and unexpected costs during your project. What Professional Installation Includes A proper installation starts with careful measuring and planning. Sheets are cut precisely to fit each wall section.Next comes hanging the drywall panels securely. Screws are placed at proper intervals to prevent future sagging or cracking. Taping and mudding follow the hanging stage. This step hides seams and creates a smooth, seamless wall surface. Sanding comes after the mud dries completely. Smooth sanding ensures paint applies evenly without visible bumps or ridges. Finally, a primer coat prepares the wall for painting. This step ensures long-lasting, even color across every surface. Corner beads add extra protection to vulnerable edges. This small detail prevents chips and dents over time. Quality control checks happen throughout every stage. Our team reviews each section before moving to the next step. Expert Drywall Solutions for Every Project Whether you’re renovating one room or building new, our experts handle projects of any size. Small repairs matter too. Cracks, holes, and water damage need quick, professional attention before problems spread further. Our team at executivedrywall handles both minor repairs and complete installations. We match our approach to your specific project needs. Home Drywall Sherwood Park Services Every home has unique layout challenges. Home drywall Sherwood park projects often involve tricky corners, curves, or high ceilings. Bedrooms, kitchens, and bathrooms each require different techniques. Moisture-resistant drywall works best in bathrooms and laundry areas. Basement finishing projects need extra attention to insulation. Proper drywall installation helps regulate temperature and reduce noise transfer. Our crews bring specialized tools for tricky spaces. We ensure clean lines and professional finishes throughout your entire home. Serving Local Businesses with Durable Walls Businesses have different needs than residential clients. Commercial drywall services Sherwood Park often involve larger spaces and tighter deadlines. Offices, retail stores, and warehouses all require durable, code-compliant walls. Fire-rated drywall is often required in commercial buildings. Minimizing downtime matters for business owners. Our team works efficiently to keep disruption to daily operations low. Executivedrywall understands commercial project demands. We coordinate closely with contractors, electricians, and other trades on-site. Why Choose Executivedrywall Experience and reliability set great contractors apart from average ones. Executivedrywall brings both to every project we complete. Our team uses quality materials and proven techniques. This combination ensures durable, long-lasting results for every client. We also prioritize clear communication throughout each project. You’ll always know timelines, costs, and next steps clearly. Local knowledge helps us navigate Sherwood Park’s unique building requirements. This experience saves time and prevents costly mistakes. We stand behind every project with solid workmanship guarantees. Client satisfaction remains our top priority on every job site. Safety is never an afterthought during any project. Our crews follow strict protocols to protect your property and family. The Installation Process Step by Step Every project begins with an on-site consultation. We assess your space and discuss your specific goals. Next, we provide a detailed, written estimate. This transparency helps you plan your budget with confidence. Material delivery and site preparation follow estimate approval. We protect existing surfaces and prepare the workspace carefully. Installation begins once preparation is complete. Our crews work efficiently while maintaining high-quality craftsmanship throughout. Final inspection ensures everything meets our quality standards. We walk through the finished space with every client. Cleanup happens before we consider any job complete. We remove debris and leave your space ready to use.We also offer follow-up visits for larger projects. This ensures everything settles properly after installation. Common Drywall Problems We Fix Water damage is one of the most common issues homeowners face. Stains, sagging, or soft spots indicate moisture problems underneath. Ignoring water stains often leads to mold growth. Mold spreads quickly behind walls and affects indoor air quality. Cracks often appear near doorways and windows. These areas experience more structural movement over time. Nail pops happen when fasteners loosen from the framing. This creates small bumps visible on painted surfaces. Uneven seams result from poor original installation work. Professional repair smooths these imperfections completely. Popped screws and loose fasteners cause visible surface bumps. Retightening or replacing fasteners restores a smooth wall finish. Texture mismatches happen when repairs don’t match surrounding walls. Skilled technicians blend new work seamlessly into existing surfaces. Tips for Maintaining Your Walls Address small cracks quickly before they spread further. Early repairs are cheaper and easier than major fixes. Control humidity levels throughout your home or business. Excess moisture damages drywall and encourages mold growth. Avoid hanging heavy items without proper anchors. Improper mounting can crack or damage wall surfaces. Schedule periodic inspections for larger commercial spaces. Catching issues early prevents costly business disruptions later. Keep vents and windows properly sealed year-round. Consistent temperature control reduces stress on drywall joints. Repaint walls every few years to maintain protection. Fresh paint also helps you spot new cracks quickly. Conclusion Quality drywall work affects your space’s look, comfort, and durability. Choosing experienced Professional Drywall Installation Sherwood Park contractors ensures lasting results.

Edmonton Drywall Companies
blogs

Edmonton Drywall Companies: Your Guide to Expert Drywall Installation

[ez-toc] Whether you’re finishing a basement, renovating a kitchen, or building an addition, the quality of your drywall work can make or break the final look of any space. Smooth walls, crisp corners, and seamless seams don’t happen by accident — they come from choosing the right drywall company for the job. If you’re searching for drywall contractors in Edmonton, here’s what you need to know to make a confident decision. Why Professional Drywall Installation Matters Drywall might look simple once it’s painted and finished, but the process behind it involves real skill. Poorly hung sheets, sloppy taping, or rushed mudding can lead to visible seams, cracks, and uneven surfaces that show up the moment light hits the wall at the wrong angle. A professional installer brings more than just labor; they bring an eye for detail, knowledge of local building codes, and the right tools to handle everything from standard walls to complex ceiling work and soundproofing. Services to Look for in an Edmonton Drywall Company Not all drywall companies offer the same scope of work. When comparing options, look for a contractor who can handle: New construction installation — hanging and finishing drywall in new builds or additions Renovation and repair work — patching holes, fixing water damage, or replacing outdated wall systems Basement finishing — a common project in Edmonton homes, often requiring vapor barriers and insulation coordination Textured and level 5 finishes — for a smooth, flawless surface, especially under certain lighting conditions Commercial drywall services — office buildouts, retail spaces, and multi-unit residential projects Soundproofing and fire-rated assemblies — important for shared walls, home theatres, or code compliance What to Ask Before Hiring Before signing a contract, a few key questions can save you time, money, and frustration: Are you licensed and insured? This protects you if something goes wrong during the project. Can I see examples of past work? Browse a project gallery or ask for references from similar-sized jobs to get a sense of finish quality. What’s included in the quote? Make sure materials, labor, cleanup, and disposal are clearly outlined. What’s your timeline? Drywall work often depends on other trades (framing, electrical, insulation), so scheduling matters. Do you offer a warranty? A reputable company should stand behind their finish work. Understanding Drywall Finish Levels Drywall finishing is typically rated on a scale from Level 0 to Level 5 Level 0–2: Basic finishes, often used in garages, storage areas, or spaces that will be covered with tile or heavy texture Level 3–4: Standard residential finish, suitable for most walls and ceilings before painting Level 5: The highest standard, used where critical lighting or a glossy paint finish would otherwise reveal imperfections Knowing which level your project needs helps you get accurate quotes and avoid paying for finish quality you don’t need — or worse, ending up with less than your space requires. Cost Factors for Drywall Projects in Edmonton Pricing varies based on several factors: Square footage of the area being drywalled Ceiling height and accessibility (vaulted ceilings or tight spaces take longer) Finish level required Material costs, including drywall type (standard, moisture-resistant, fire-rated, soundproof) Repair complexity, if the job involves patching damage rather than a fresh install Getting quotes from a few local contractors is the best way to understand a fair price range for your specific project. Tips for a Smooth Project Plan around other trades. Drywall usually goes up after framing, electrical, and plumbing rough-ins are complete, so coordinate timing with your general contractor if you have one. Clear the work area. Give the crew easy access to walls and ceilings to keep the job moving efficiently. Ask about dust control. Sanding drywall mud creates fine dust — some companies offer dust-containment systems, which is worth asking about if you’re living in the home during renovations. Don’t rush the mudding and sanding stages. Multiple coats and proper drying time are what separate a good finish from a great one. Choosing the Right Fit The best drywall company for your project is one that matches your specific needs — whether that’s a small patch repair, a full basement finish, or a large commercial buildout. Look for clear communication, transparent pricing, verifiable experience, and a portfolio that reflects the finish quality you’re after. Taking the time to vet a few local Edmonton drywall companies before committing will pay off in a finished space that looks clean, professional, and built to last. Ready to get started? Request a free quote and get your project scheduled.

blogs

Drywall Companies Edmonton What to Look for Before You Hire

[ez-toc] Choosing between the many drywall companies in Edmonton can feel overwhelming, especially when your project timeline, budget, and finished walls all depend on getting the right team the first time. Drywall work sits at the intersection of structural integrity and visual finish — a poorly taped seam or an uneven texture can undo months of planning on a renovation or new build. Understanding what separates a dependable drywall contractor from an average one helps homeowners and business owners in Edmonton make a decision they won’t regret. Why Drywall Installation Requires More Than Just Hanging Boards Drywall installation is often mistaken for a simple task: measure, cut, screw the board to the studs, done. In reality, the process involves several interconnected stages — framing inspection, board selection, hanging, taping, mudding, sanding, and priming — each of which affects the next. A board hung slightly off-level throws off the taping process. Poor mud application leads to visible seams once paint is applied. Experienced drywall companies in Edmonton understand that the finish is only as good as the preparation behind it, which is why reputable contractors treat every stage as part of one continuous system rather than isolated tasks. Edmonton’s climate adds another layer of complexity. Cold winters and dry indoor heating cycles can cause drywall compound to cure unevenly if humidity and temperature aren’t managed correctly during installation. Local drywall companies familiar with Alberta’s seasonal shifts know how to time projects and adjust drying periods to keep walls crack-free and stable long after the crew has left. Residential vs. Commercial Drywall Needs Not all drywall projects are the same, and a company’s experience across both residential and commercial settings often reveals its versatility. Residential drywall work — basement finishing, home additions, renovations — usually prioritizes clean aesthetic finishes, sound dampening between rooms, and minimal disruption to daily living. Commercial drywall projects, on the other hand, often involve fire-rated assemblies, larger square footage, tighter regulatory compliance requirements, and coordination with other trades, such as electrical and HVAC contractors. A drywall company that has handled both types of projects typically brings a broader technical toolkit: knowledge of fire-rated board systems, acoustic insulation techniques, moisture-resistant board for bathrooms and basements, and level-5 finishes for spaces with dramatic lighting where imperfections would otherwise stand out. Key Factors When Comparing Drywall Companies in Edmonton When evaluating drywall companies Edmonton, a few markers consistently separate reliable contractors from the rest: Licensing and insurance. A legitimate drywall contractor carries liability insurance and, where applicable, WCB coverage — protecting both the client and the workers on site. Portfolio and specialization. Companies that can show a range of completed work, from basic patch repairs to full commercial builds, demonstrate adaptability rather than a narrow skill set. Transparent estimates. Detailed, itemized quotes that break down material, labor, and finish level (from level 1 to level 5) help avoid surprise costs later in the project. Finish quality standards. Ask what finish level the company defaults to for the type of space involved. Hallways and utility areas often only need a basic finish, while feature walls or areas with pot lighting require a smooth, near-flawless level 5 finish to avoid shadowing. Timeline reliability. Drywall is typically a mid-project trade — it depends on framing being complete and affects when painters, flooring crews, and trim carpenters can start. A company with a track record of meeting schedules keeps the entire renovation or build on pace. The Value of Working with a Local, Established Contractor Executive Drywall has built its reputation in Edmonton by focusing on precision at every stage of the process — from board selection through to the final sanded finish. Working with a locally established company means access to a team that understands Edmonton’s building codes, climate-related material behavior, and the expectations of both residential clients and commercial developers. Rather than treating drywall as an afterthought in a larger construction project, an experienced Edmonton-based team approaches it as a craft that directly shapes how a finished space looks, feels, and performs over time. Smooth, durable walls are the quiet foundation of a well-finished interior — and getting them right from the start avoids costly rework down the line. Final Thoughts Edmonton property owners have no shortage of drywall companies to choose from, but the right partner is one that treats drywall installation as a technical craft rather than a commodity service. Prioritizing experience, transparent communication, and finish quality will consistently lead to better long-term results — whether the project is a single-room renovation or a multi-unit commercial build.

Scroll to Top